1. Introduction to Embroidering Names on Clothing
Personalizing clothing with embroidered names is more than just a craft—it’s a way to infuse garments with meaning, commemorate special moments, or simply make a statement that’s uniquely yours. Whether you’re adding a child’s name to a backpack, monogramming a wedding handkerchief, or branding work uniforms, name embroidery turns everyday items into keepsakes.
In this guide, we’ll explore everything you need to know to embroider names on clothes with confidence. From choosing the right supplies and tools, to mastering both hand and machine techniques, and selecting stitches that make your lettering pop, you’ll find expert advice for achieving neat, professional results. Ready to transform your garments into personalized works of art? Let’s dive in!
Table of Contents
- 1. Introduction to Embroidering Names on Clothing
- 2. Essential Supplies for Embroidering Names
- 3. Hand Embroidery Techniques for Names
- 4. Machine Embroidery for Professional Results
- 5. Achieving Professional Lettering Quality
- 6. Handling Challenging Fabrics
- 7. Creative Embellishment Techniques
- 8. Conclusion: Mastering Personalized Embroidery
- 9. FAQ: Embroidering Names on Clothes
2. Essential Supplies for Embroidering Names
Before you thread your first needle or power up your embroidery machine, assembling the right toolkit is key to a smooth, frustration-free experience. Let’s break down the must-haves for both hand and machine embroidery.
2.1 Threads, Needles, and Hoops: The Core Toolkit
Threads:
For hand embroidery, DMC Stranded Cotton Floss is the gold standard. Its six separable strands let you control the thickness of your lettering—use a single strand for delicate scripts or all six for bold, standout names. If you crave color gradients or multi-tonal effects, Cotton Coloris threads are a fantastic option, while Venne 20/2 Mercerised Cotton and ITO Nui Spun Silk offer premium sheen and strength for special projects.
Needles:
Selecting the right needle is crucial. Crewel needles are the go-to choice for most hand embroidery, thanks to their large eyes that accommodate embroidery floss. For looser weaves like aida cloth, tapestry needles with blunt tips glide between threads without snagging. Always match your needle size to both fabric weight and thread thickness to avoid puckering or fabric damage.
Hoops:
An embroidery hoop keeps your fabric taut, making stitches even and preventing puckering. Wooden hoops provide excellent stability and are perfect for longer sessions, while plastic hoops are lightweight and grip delicate fabrics securely. Choose a smaller hoop for precise control over name designs, or a larger one for multiple names or bigger layouts. For large projects, consider an embroidery frame or stand to reduce hand fatigue.
Fabric:
The best canvases for name embroidery are cotton, linen, and silk—they’re durable and accept stitches beautifully. Pre-wash and iron your fabric to prevent distortion after stitching. Medium-weight fabrics strike the right balance between stability and ease of stitching.
Cutting Tools & Accessories:
Sharp, pointed embroidery scissors are essential for clean thread cuts and neat letter edges. Pinking shears help prep fabric, while a floss organizer keeps your threads tidy and ready for color changes. Don’t forget a pin cushion or needle minder for safe needle storage during breaks.
2.2 Stabilizers and Transfer Methods for Precision
Stabilizers:
Stabilizers are the unsung heroes of embroidery, especially when working directly on garments. They prevent stretching, puckering, and distortion, ensuring crisp, professional lettering.
- Tear-away stabilizers are ideal for stable fabrics and can be easily removed after stitching.
- Cut-away stabilizers offer permanent support for stretchy or delicate materials, making them perfect for modern clothing fabrics.
- Wash-away stabilizers are a favorite for t-shirts and similar items—they dissolve completely after stitching, leaving no trace.
Transfer Methods:
Accurate pattern transfer is vital for well-aligned, readable names. Here are some tried-and-true techniques:
- Water-soluble pens and Frixion erasable pens let you draw guidelines directly onto fabric. Frixion pens are especially handy—their marks disappear with a touch of heat from an iron or hairdryer.
- Light tables (or even a bright window) allow you to trace printed designs onto fabric with ease.
- Water-soluble paper is a game-changer for complex or curved lettering—simply stitch through the paper and dissolve it away when finished.
- Carbon transfer paper and fabric pencils are also great for transferring patterns, especially on darker fabrics.
Organization Tools:
Keep your workspace efficient and your threads tangle-free with floss bobbins and organizer cases. These little touches make a big difference, especially in multi-colored or intricate name designs.
With these supplies at your fingertips, you’re ready to tackle any name embroidery project with confidence and precision.
3. Hand Embroidery Techniques for Names
Hand embroidery gives you the freedom to infuse every letter with personality, whether you’re aiming for classic elegance or playful whimsy. Let’s explore the foundational stitches and some advanced techniques that will make your embroidered names stand out.
3.1 Fundamental Stitches: Running, Back, and Split Stitch
Running Stitch: The running stitch is the simplest way to outline letters—a series of small, evenly spaced stitches that create a dashed line. It’s perfect for beginners and for lightweight, informal lettering. To start, bring your needle up at point A, down at point B, and continue along your traced letter. For straight lines, use the sewing method (weaving in and out), but for curves, make one stitch at a time for better control.
Backstitch: If clarity and definition are your goals, the backstitch is your best friend. This stitch creates a solid, continuous line—ideal for readable, professional-looking names. Start with a single stitch, then bring your needle up a stitch-length away and go back into the end of the previous stitch. This “reverse” motion eliminates gaps and is especially effective for block letters or simple scripts.
Split Stitch: For letters with curves or when you want a bit of texture, try the split stitch. Begin with a straight stitch, then bring your needle up through the center of the previous stitch, literally “splitting” it in two. Repeat this process to create a braided effect that hugs curves beautifully. This stitch is especially forgiving for small or intricate lettering.
Thread Management Tip: To avoid tangling, cut your embroidery floss to about the length of your forearm. Most name embroidery looks best with three strands of floss, but adjust as needed for your desired thickness.
3.2 Advanced Stitches for Decorative Effects
Chain Stitch: Want your letters to pop with bold texture? The chain stitch links loops together, forming a thicker, raised line that’s perfect for large, playful fonts or initials. It’s a bit bulkier, so best reserved for medium to large letters.
Satin Stitch: For filled-in, solid letters—think monograms or statement names—the satin stitch is your go-to. Lay parallel stitches closely together across the width of each letter section, creating a smooth, glossy finish. It takes practice to master, but the results are stunning.
French Knots: Add a touch of flair by using French knots as decorative accents—dotting i’s, adding periods, or embellishing serifs. These tiny, textured knots bring dimension and whimsy to your lettering.
Efficiency and Application: Choose your stitch based on the font style, letter size, and desired effect. For fine scripts, stick with split or stem stitch; for bold, chunky letters, chain or satin stitch will shine. Remember, the more strands you use, the more thread you’ll consume, so plan accordingly.
With these techniques in your repertoire, you’re ready to create embroidered names that are crisp, expressive, and uniquely yours. Don’t be afraid to mix and match stitches for a look that’s all your own—after all, embroidery is as much about creativity as it is about technique!
4. Machine Embroidery for Professional Results
Machine embroidery opens the door to flawless, repeatable, and highly customizable name designs on clothing. With the right tools and digital know-how, you can achieve crisp, professional results that rival commercial garments—whether you’re personalizing a onesie or branding a set of uniforms. Let’s break down the essentials: from digital design setup to hooping techniques and machine settings that make all the difference.
4.1 Software, File Formats, and Design Setup
The journey to perfect machine-embroidered names starts long before you thread your needle—it begins in the digital realm. Choosing best digitizing software for embroidery is your first step. For beginners, Embrilliance Essentials is a standout choice, offering intuitive tools for adding and customizing lettering. Its built-in hoop selection feature lets you visualize your design within standard 4×4 or 5×7 hoops, ensuring your name fits perfectly on the garment.
A game-changer for efficiency is the BX font format. Unlike traditional methods that require importing each letter as a separate file, BX fonts let you type out names directly in the software, with automatic spacing and alignment. This not only speeds up your workflow but also delivers consistent, professional-looking results.
For those ready to explore advanced customization, Hatch Embroidery offers a treasure trove of over 60 digitized fonts and 80+ monogram templates. With features like one-click artwork conversion and node-by-node editing (as found in Embird), you can fine-tune every stitch—perfect for those who crave creative control or need to match specific brand styles.
When it comes to file formats, compatibility is key. Most machines accept formats like BX (for Embrilliance), SVG (for vector-based designs), and a wide range of proprietary types supported by Embird. Always check your machine’s requirements before exporting. The ability to import SVGs means you can leverage professional typography and logos, bridging the gap between graphic design and embroidery.
Design placement and sizing are equally critical. Use your software’s preview tools to position names exactly where you want them on the garment, and take advantage of proportional resizing to maintain letter clarity at any scale. Remember, the minimum recommended height for machine-embroidered letters is typically around 0.25 inches—smaller fonts risk losing definition.
Finally, don’t overlook stitch density and finishing settings. Most modern software will auto-optimize density for your chosen fabric, but manual tweaks may be necessary for specialty applications. After stitching, remove temporary stabilizers with care to avoid pulling or distorting your beautiful new name embroidery.
4.2 Hooping Techniques and Machine Settings
Even the most perfectly digitized design can fall flat if your hooping and machine setup aren’t up to par. Hooping is the unsung hero of embroidery quality—get it right, and your names will be crisp, centered, and free of puckers.
Centering and Placement: Start by folding your garment to locate the center point of your embroidery area. Align this with your hoop’s center marker and the machine’s built-in guides. For shirts and sweatshirts, placement is usually about 2 inches below the collar, but always double-check with your design preview.
Stabilizer Layering: The right stabilizer is your secret weapon against distortion. For stable fabrics, a single layer of tear-away may suffice. For knits or stretchy materials, opt for a cut-away stabilizer or a fusible poly mesh on the garment’s wrong side. As seen in popular YouTube tutorials, ironing the stabilizer in place helps prevent shifting during stitching.
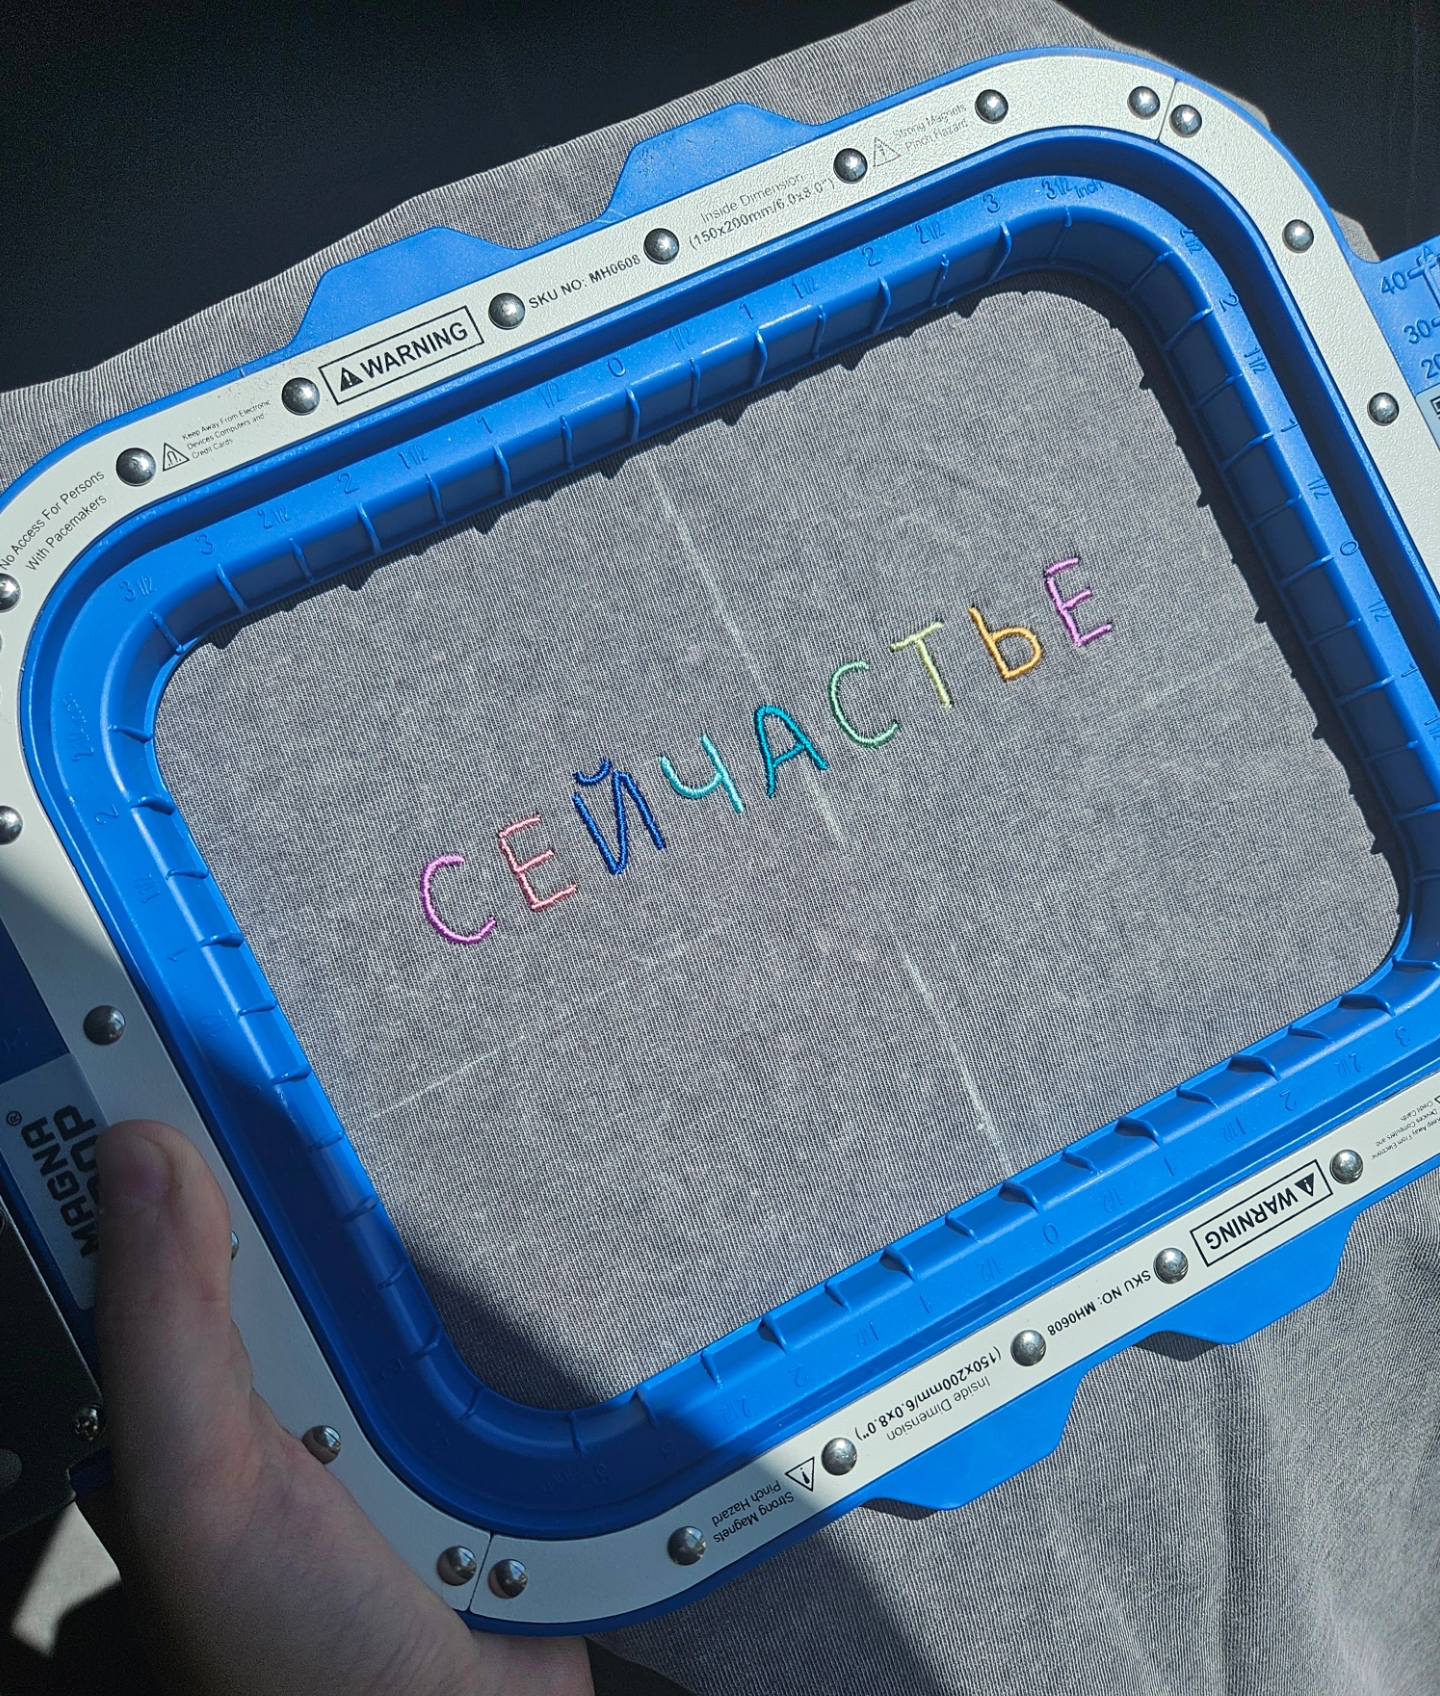
Magnetic Hoops for Efficiency: When working with garments—especially those with seams, buttons, or zippers—traditional hoops can be fiddly and time-consuming. Magnetic hoops, like those from Sewtalent, offer a fast, secure alternative. They clamp fabric evenly without over-stretching, making them ideal for both beginners and pros. Simply lay the fabric between the magnetic frames, and you’re ready to stitch—no more wrestling with screw-tightened hoops.
Tension and Machine Settings: Adjust your machine’s thread tension to match the fabric and stabilizer combination. Too tight, and you risk puckering; too loose, and your letters may look sloppy. Test on a scrap first. For knits, a slightly lower speed can help prevent heat buildup and thread stretching, as highlighted in video demonstrations.
Reducing Puckering: The floating method—where you hoop only the stabilizer and then lay the fabric on top—can be a lifesaver for delicate or stretchy garments. Secure with temporary adhesive or pins, and add a water-soluble topper for extra surface stability. Always double-check that only the top layer is hooped to avoid accidental stitching through both sides of a shirt or sweatshirt (a classic beginner mistake!).
With these techniques, you’ll achieve flawless, professional name embroidery—every time. Ready to take your personalization game to the next level? Let’s move on to perfecting your lettering style.
5. Achieving Professional Lettering Quality
Embroidery is an art, but professional-looking names require a dash of science, too. From matching stitches to fonts, to nailing the perfect spacing and tension, here’s how to make your embroidered names stand out on any garment.
5.1 Stitch Selection for Different Font Styles
Not all stitches are created equal—especially when it comes to lettering. The stitch you choose can transform a simple name into a statement piece or, conversely, doom it to illegibility.
- Backstitch: The go-to for block letters and bold, unbroken outlines. Its solid, continuous line delivers maximum clarity—ideal for monograms, uniforms, and any text where readability is king.
- Split Stitch: Perfect for small fonts or curvy scripts. This stitch hugs tight bends and adds subtle texture, making it a favorite for intricate or whimsical designs.
- Stem Stitch: The secret weapon for cursive and flowing script fonts. Its rope-like appearance glides around corners and curves, lending elegance to wedding handkerchiefs or personalized gifts.
- Chain Stitch: Want chunky, eye-catching letters? Chain stitch creates a raised, textured line that pops, especially on larger designs.
- Satin Stitch: The gold standard for filled, solid letters. Use it to create glossy, high-impact monograms or to fill thick parts of display fonts. For extra flair, combine satin stitch fills with backstitch or stem stitch outlines.
Thread Consumption: Keep in mind that denser stitches (like satin and chain) use more thread than outline stitches (like backstitch or split stitch). If you’re working on a large project or using specialty threads, plan accordingly.
Font Matching:
- Block fonts + backstitch
- Cursive/script fonts + stem stitch
- Display/chunky fonts + satin or chain stitch
Test your stitch and font combo on scrap fabric first. Sometimes, what looks great on screen doesn’t translate perfectly to thread and cloth!
5.2 Font Sizing, Spacing, and Tension Control
Professional embroidery isn’t just about pretty stitches—it’s about precision.
Minimum Size Matters: For machine embroidery, keep letters at least 0.25 inches high to preserve detail. Smaller fonts may blur or lose legibility, especially on textured fabrics.
Density Management: Too much density can cause puckering; too little, and your letters look sparse. Satin stitches work best between 1mm and 12mm widths. For fills, avoid going below 1.5mm spacing to prevent stiffness.
Spacing and Alignment: Use your software’s guidelines and preview tools to maintain even spacing and straight baselines. For hand embroidery, mark lines with a water-soluble pen or Frixion erasable pen—heat will remove any leftover marks after stitching.
Avoiding Thread Shadows: Don’t trail thread between letters on light fabrics; it can show through and ruin the look. Instead, finish off each letter and start fresh for the next, unless you’re working with a connected script font.
Tension Tips: Maintain even tension throughout—too tight, and you’ll pucker the fabric; too loose, and your letters may sag. For challenging fabrics, stabilize well and consider using a hooping station for extra control.
Quality Assurance: Always test your setup on scrap fabric. Check density, alignment, and overall appearance before committing to your final garment. A little extra prep saves a lot of heartache!
With these strategies, your embroidered names will look crisp, balanced, and utterly professional—worthy of any boutique or brand.
6. Handling Challenging Fabrics
Stretchy tees, wispy sheers, and slinky jerseys—these fabrics can make even seasoned embroiderers break a sweat. But with the right stabilizers, needles, and hooping tricks, you can conquer any material and keep your names looking flawless.
6.1 Strategies for Stretch and Thin Materials
Stretch Fabrics (Knits, Jerseys, Spandex):The enemy here is distortion—stretchy fabrics love to pucker under embroidery. The solution? Cut-away stabilizers. These provide permanent support, keeping your design crisp even after countless washes and wears.
For knits, fuse a poly mesh backing to the garment’s wrong side. Hoop the stabilizer separately, then float the fabric on top, securing it with temporary adhesive or a self-adhesive tear-away. Pre-wash and dry the mesh to avoid future shrinkage surprises.
Thin/Sheer Fabrics:Delicate materials need extra TLC. Start with a heavy starch to stiffen the fabric, then use at least two layers of tear-away stabilizer. Hoop everything together, using temporary adhesive to prevent shifting.
Hoop Floating Technique:Instead of hooping the fabric directly (which can stretch or damage it), hoop only the stabilizer and lay the fabric on top. Secure with pins or adhesive. For extra surface stability, float a water-soluble topper over the design area.
Magnetic Hoops for Stretch Fabrics:Magnetic machine embroidery hoops—like those from Sewtalent—shine on stretch materials. They clamp fabric evenly without overstretching, making it easy to achieve smooth, pucker-free results.
Design Adaptation:Choose “light” designs for stretch and thin fabrics—avoid dense fills that can weigh down the material. For dense designs, consider appliqué instead of direct embroidery to minimize stress.
6.2 Needle and Thread Choices for Delicate Fabrics
Needle Selection:- Ballpoint needles are a must for stretch fabrics. They glide between fibers, preventing snags and runs.
- For lightweight cottons and sheers, use a sharp, fine embroidery needle for clean, precise stitches.
Thread Choices:Opt for lighter-weight threads on delicate fabrics to avoid bulk and reduce tension. For dense designs, 40-weight thread is a reliable choice.
Tension and Stitch Length:Adjust machine tension to suit your fabric and stabilizer. Lower tension for stretch fabrics; use moderate tension for sheers. Shorten stitch length for tight curves and corners—this helps maintain smooth lines without pulling.
Fabric Prep:Always pre-wash and iron your fabric before embroidering. For extra-stretchy materials, consider a test run on scrap fabric to dial in your settings.
Execution Tips:- Embroider from the inside out to push excess material toward the edges, preventing bunching in the center.
- Slow down your machine speed—fast stitching can generate heat, stretching threads and causing puckering when they cool.
With these expert techniques, even the trickiest fabrics become your canvas. No more puckers, no more frustration—just beautiful, personalized embroidery on any garment your heart desires.
Ready to take your embroidery to new heights? With the right digital tools, stitch know-how, and fabric strategies, you’re set to create names that truly stand out—on any fabric, for any occasion. Happy stitching!
7. Creative Embellishment Techniques
Personalizing garments with embroidered names is just the beginning—true artistry emerges when you blend fonts, play with color, and introduce dimensional effects. Let’s dive into the creative world of embellishment techniques that transform simple lettering into wearable art.
7.1 Font Combinations and Color Gradients
Why settle for a single font when you can create visual intrigue by mixing styles? Combining script and block fonts within a name or phrase adds instant personality. For example, try pairing a flowing cursive for the first name with bold, block letters for the surname—this contrast draws the eye and makes each word pop. When choosing fonts, consider legibility and the overall vibe you want to convey: script for elegance, block for clarity, or even quirky handwritten styles for a playful touch. Always test your font combinations on scrap fabric before committing to your final piece.
But don’t stop at fonts—color can tell a story all its own. Variegated threads are your secret weapon for effortless color transitions. These threads shift hues along their length, creating a subtle ombré effect as you stitch. DMC Coloris, for example, offers a range of multi-tonal threads that bring depth and movement to your lettering without the need to change threads mid-project. For a more controlled gradient, blend two or more thread colors by alternating strands or gradually transitioning from one shade to another using long-and-short stitches. This technique is particularly striking on large, filled-in letters—think monograms or statement words on sweatshirts.
Looking for inspiration? Contemporary embroidery trends favor clean, readable designs with a twist—think oversized script on the back of a denim jacket, or a rainbow gradient spelling out a child’s name on a backpack. The key is to experiment: mix fonts, layer colors, and let your imagination lead the way. The result? Embroidered names that are anything but ordinary.
7.2 3D Effects and Embellishments
Ready to add dimension and drama to your embroidered names? 3D techniques and embellishments can take your work from flat to fabulous.
Puff Embroidery is a standout method for creating raised, tactile letters. By stitching over a specialized foam layer, you achieve bold, elevated text that begs to be touched. This technique is perfect for children’s wear, sports jerseys, or any project where you want the name to literally stand out. Just remember to use strong, dense stitches to fully cover the foam and maintain crisp letter edges.
Chenille embroidery offers another plush, dimensional effect. Using looped yarn, chenille creates a velvety texture reminiscent of vintage varsity jackets—ideal for patches, monograms, or retro-inspired designs.
If you crave texture, try tufting or couching. These methods add tactile depth by layering threads or yarns on the fabric surface, turning simple letters into multi-sensory experiences.
embroidery machine applique designs via appliqué layering is a game-changer for bold, multi-textured effects. Start by outlining your name, then secure fabric pieces within the letter shapes using fill stitches. This opens up endless possibilities: denim for a rugged look, pastels for spring, or metallics for a touch of glam. Appliqué not only adds color and texture but also allows you to weave personal stories or seasonal themes directly into your design.
For a touch of luxury, bead and sequin embroidery can’t be beat. Carefully sew beads or sequins onto your letters to add sparkle and sophistication—perfect for bridal wear, evening garments, or special gifts. Strategic placement can highlight specific letters, create gradient effects, or simply add a hint of shimmer.
Finally, consider embroidered patches for versatility and durability. Stitch your name onto a separate fabric piece, then attach it to garments as needed. Patches are ideal for uniforms, team apparel, or items that require frequent washing.
The creative possibilities are endless—mix and match these techniques to craft embroidered names that are as unique as their wearer. Remember, the only limit is your imagination!
8. Conclusion: Mastering Personalized Embroidery
Personalizing clothes with embroidered names is both an art and a science. By mastering stitch selection, fabric handling, and thoughtful machine setup, you unlock endless possibilities for creative expression. Don’t be afraid to experiment—mix fonts, play with color gradients, and try dimensional embellishments. Each project is a chance to refine your skills and discover new favorites. Whether you’re a hobbyist or a professional, the journey to perfect personalization is filled with learning and joy. Happy stitching!
9. FAQ: Embroidering Names on Clothes
9.1 Q: What’s the best stitch for beginners to embroider names?
A: The backstitch is widely recommended for beginners. It creates a solid, continuous line that’s easy to control and works well for both block and script fonts. Split stitch and running stitch are also beginner-friendly options for outlining letters.
9.2 Q: How do I remove transfer marks after finishing embroidery?
A: Most water-soluble pens and Frixion erasable pens can be removed with a damp cloth or a touch of heat from an iron or hairdryer. Always test on a fabric scrap first to ensure no residue remains.
9.3 Q: How can I fix puckering in my embroidered names?
A: Puckering is often caused by insufficient stabilization or uneven tension. Use the correct stabilizer for your fabric (cut-away for stretch, tear-away for stable fabrics), ensure your hoop is taut, and adjust machine tension as needed. For delicate fabrics, try hooping only the stabilizer and floating the fabric on top.
9.4 Q: What’s the minimum font size for clear embroidered letters?
A: For machine embroidery, letters should be at least 0.25 inches high to maintain clarity and legibility. For hand embroidery, simple fonts and short stitch lengths work best for small text. Always test on scrap fabric before starting your final project.
Ready to transform your garments with personalized, professional-looking embroidery? Grab your favorite threads and let your creativity shine!