1. Introduction to Stitching Fabric Essentials
Choosing the right fabric is the secret ingredient to any successful sewing or embroidery project. The fabric you select doesn’t just shape the look and feel of your creation—it directly impacts durability, comfort, and how smoothly your project comes together. In this guide, we’ll explore the core types of stitching fabrics, how to select them based on weight, content, and stretch, and reveal professional techniques for working with each. Whether you’re a seasoned pro or just threading your first needle on the best sewing machine for embroidery and sewing, mastering fabric selection is your first step toward professional-quality results.
Table of Contents
- 1. Introduction to Stitching Fabric Essentials
- 2. Fundamental Fabric Types: Woven vs. Knit Materials
- 3. Choosing Fabric by Weight, Content and Stretch
- 4. Where to Buy Quality Stitching Fabrics
- 5. Sewing Stretchy Fabrics Without Specialized Machines
- 6. Beginner-Friendly Fabric Recommendations
- 7. Machine Embroidery Fabric Strategies
- 8. Fabric Care and Maintenance Guide
- 9. Conclusion: Mastering Fabric for Professional Results
- 10. FAQ: Stitching Fabric Essentials Answered
2. Fundamental Fabric Types: Woven vs. Knit Materials
Understanding the essential differences between woven and knit fabrics is the foundation of fabric mastery. Each type has a unique structure, behavior, and ideal use—think of it as the difference between a classic tailored blazer and your favorite cozy tee.
2.1 Structural Differences in Construction Methods
Let’s start at the thread level. Woven fabrics are crafted by interlacing two sets of threads—warp (lengthwise) and weft (crosswise)—at right angles. This grid-like structure creates a fabric that’s stable, with little inherent stretch unless blended with elastic fibers like spandex. Imagine a tightly woven basket: firm, structured, and reliable.
Knit fabrics, on the other hand, are made from a single yarn looped together in a series of interlocking stitches. This looping system gives knits their signature stretch and flexibility—kind of like a chain-link fence that can flex and move. The result? Fabrics that can expand and recover, making them perfect for garments that need to move with you.
The difference is more than just academic. Wovens offer crisp lines and hold their shape, while knits provide comfort and adaptability, stretching to fit curves and movements.
2.2 Performance Characteristics and Applications
Stretch and Elasticity: Knit fabrics are the yoga instructors of the textile world—naturally flexible, stretching easily across their width and, depending on the knit, sometimes along their length. This makes them ideal for activewear, t-shirts, leggings, and anything that benefits from a bit of give. But beware: overstretching can lead to runs or permanent distortion.
Woven fabrics, by contrast, are the steadfast architects—stable, with minimal stretch, especially across the width. They’re the go-to for structured garments like button-up shirts, trousers, jeans, and jackets—anywhere you want clean lines and dependable shape.
Durability and Comfort: Wovens are generally more durable, standing up to frequent wear and tear. Knits, while less resistant to snags, win in the comfort department, offering a soft, flexible feel that hugs the body.
Applications:
- Knit Fabrics: T-shirts, leggings, sweaters, underwear, jersey, ponte, ribbing, fleece, interlock knit, spandex blends, and more.
- Woven Fabrics: Shirts, trousers, jeans, denim jackets, broadcloth, poplin, sateen, flannel, lawn, corduroy.
Handling Differences: YouTube sewists often note that knits can be trickier to cut and sew due to their stretch, but they reward you with garments that move with you. Wovens are easier for beginners—no rolling edges or unexpected stretching—making them perfect for learning the ropes.
2.3 Fabric Identification Techniques
Not sure if your fabric is woven or knit? Here’s how to tell:
- Stretch Test: Gently pull the fabric. Knits will stretch easily across the width (and sometimes length), while wovens will resist.
- Wrinkle Test: Ball up a small piece in your fist. Knits spring back with minimal creasing; wovens hold onto those wrinkles, showing their structural rigidity.
- Fray Test: Examine the edges. Wovens tend to fray, especially along the length. Knits may curl at the edges but generally don’t fray.
For the visually inclined, magnified images of weave patterns reveal the basket-like interlacing of wovens versus the looping structure of knits. Once you see it, you’ll never mistake one for the other again.
3. Choosing Fabric by Weight, Content and Stretch
Selecting the perfect fabric isn’t just about color or print—it’s about understanding weight, fiber content, and stretch. These three factors form the holy trinity of fabric selection, directly influencing how your project looks, feels, and performs.
3.1 Weight Categories and Project Suitability
Fabric weight is measured in grams per square meter (GSM) or ounces per square yard. It determines how a fabric drapes, its opacity, and its suitability for different projects.
| Weight Category | GSM (approx.) | Typical Use |
|---|---|---|
| Ultra-lightweight | <100 | Sheer overlays, lingerie |
| Lightweight | 100–170 | Blouses, summer dresses, linings |
| Midweight | 170–340 | Shirts, dresses, slacks, light jackets |
| Heavyweight | 340+ | Jeans, jackets, outerwear |
For example, a breezy summer blouse works best with a lightweight fabric, while a structured jacket demands a heavier material. Knit fabrics can feel heavier due to their construction, even if their GSM matches a woven—so always handle and drape the fabric before deciding.
3.2 Fiber Content Impact on Performance
Fiber content is the DNA of your fabric. Natural fibers like cotton and linen breathe well and are easy to sew, while synthetics like polyester and rayon offer durability and wrinkle resistance. Blends combine the best of both worlds.
Stretch-inducing fibers—spandex, lycra, elastane—add flexibility. A common blend for stretch fabrics is 95% cotton and 5% spandex, perfect for fitted garments. Athletic knits may have even more spandex for compression.
Some fabrics, like 100% cotton interlock, have poor stretch recovery, meaning they may bag out and not return to their original shape. Always check the label and, if possible, test the fabric’s recovery before committing to a project.
3.3 Stretch Measurement and Recovery Testing
Understanding stretch is crucial for fitted garments. Fabrics can have:
- 2-way stretch: Stretches across the width (horizontal).
- 4-way stretch: Stretches both widthwise and lengthwise (horizontal and vertical).
To measure stretch percentage:
- Fold the fabric to create two layers.
- Hold the fabric at the edge and at a 5-inch mark.
- Gently stretch to see how far it extends. If it reaches 6 inches, that’s 20% stretch.
Patterns often specify required stretch percentages. Using a fabric with too little stretch can result in a garment that’s uncomfortably tight; too much stretch may cause sagging.
Recovery is the fabric’s ability to return to its original size after stretching. Good recovery is essential for areas like cuffs, waistbands, and activewear—poor recovery leads to sagging and loss of fit.
With these fundamentals, you’re equipped to approach any fabric store or online shop with confidence. Remember: touch, test, and trust your instincts. The right fabric transforms a project from “homemade” to “handcrafted perfection.” Ready to dive deeper? Let’s keep stitching!
4. Where to Buy Quality Stitching Fabrics
The fabric marketplace has never been more vibrant—or more overwhelming. Whether you’re a seasoned stitcher or a fabric-curious newcomer, knowing where to source quality stitching fabrics can make or break your next project. Let’s unravel the best places to shop, what to expect in terms of price, and how regional trends are shaping the fabric landscape.
Online Retailers: Convenience Meets Variety
Major e-commerce platforms like Walmart offering walmart embroidery machines have become go-to destinations for fabric shoppers, offering over 1,000 fabric options by the yard. You’ll find everything from basic cottons (starting around $4.17 per yard) to specialty acrylic felts (about $11.90 per yard). Walmart’s detailed product specs, customer reviews, and reliable shipping (usually within 3+ days) make it a practical choice for both everyday and unique materials.
Specialized online stores—think Fabric Depot Online, Fabric Mart, and Little Fabric Shop—cater to more discerning tastes. Fabric Depot Online is known for quality linen, wool, silk, velvet, and basics like muslin and broadcloth at discount prices. Fabric Mart focuses on discounted designer fashion fabrics, while Little Fabric Shop excels in modern solids such as Bella Solids and Peppered Cottons. These shops often feature exclusive collections and competitive pricing, giving you access to premium materials that might be hard to find locally.
Brick-and-Mortar and Specialty Stores: The Tactile Experience
There’s nothing quite like feeling a fabric before you buy. Local sewing and quilting shops offer a curated selection of wovens, knits, and specialty materials, often with expert staff ready to answer your questions. While prices can be higher than online, the ability to touch, drape, and compare fabrics in person is invaluable—especially for beginners or when color-matching is critical.
Pricing by Material: What to Expect
Fabric prices vary widely based on fiber content, weave, and brand. Here’s a quick breakdown:
| Material | Typical Price Range (per yard) | Notes |
|---|---|---|
| Basic Cotton | $1–$5 | Organic options at premium end |
| Quilting Cotton | $10–$25 (per meter) | Premium solids (e.g., Art Gallery) ~$10 |
| Silk | $20–$50+ | Specialty types cost more |
| Linen | $10–$25 | Quality garment linen $20–$30/meter |
| Polyester | $3–$7 | Budget-friendly, durable |
| Nylon | $4–$8 | Durable, slightly pricier than polyester |
| Rayon | $4–$12 | Varies by finish and blend |
| Knit Cotton | $20–$30 (per meter) | For stretch garments |
| Denim | $20+/meter | Heavyweight, specialized |
Premium cotton solids, like Art Gallery Pure Solids, are manufactured in South Korea with Oeko-Tex and GOTS certifications, retailing around $10 per yard for lightweight, high-thread-count fabric. American-made options may cost around $9 per yard, reflecting local production and sustainability standards.
Counts, Weights, and Technical Specs
Thread count and fabric weight play a big role in both price and performance. For example, quilting cottons often feature 200-thread count and weigh about 3.7 oz per square yard, while medium-weight options can reach 4.35 oz. Always check these specs to ensure the fabric matches your project needs.
Project Planning: How Much to Buy?
Garment construction requires careful calculation. A short-sleeve shirt may need about 1 meter, a long-sleeve up to 2 meters, and dresses can range from 2–4 meters. Real-world example: a hemp/cotton blend shirt used 1.45 meters of fabric at $17, but only half was needed—so the actual material cost was $8.50, plus $0.50 for thread.
Sustainability and Regional Trends
Eco-friendly fabrics—organic cotton, recycled polyester, hemp—are on the rise, often carrying certifications like GOTS or Fair Trade. These options may cost more upfront but appeal to environmentally conscious makers and can offer superior quality. Regional manufacturing also matters: South Korean mills and US-grown cottons are prized for quality and ethical standards, while supply chain disruptions and global economics continue to impact fabric prices.
Final Thoughts
Whether you shop online for convenience or in-store for the tactile experience, understanding the range of options and price structures helps you make informed choices. Stay curious, compare, and don’t hesitate to try new sources—your perfect fabric might just be a click or a short drive away.
5. Sewing Stretchy Fabrics Without Specialized Machines
Stretchy and knit fabrics can feel like the wild stallions of the sewing world—unpredictable, prone to curling, and seemingly impossible to tame without a serger. But here’s the secret: with a few key adjustments and the right techniques, your regular sewing machine can handle knits like a pro.
5.1 Machine Setup and Needle Selection
The foundation of successful knit sewing is the right needle. Ballpoint or jersey needles have rounded tips that slip between knit fibers, reducing the risk of snags or holes. For fine knits, choose smaller needles; for heavier knits, go larger. If your fabric is loaded with spandex or lycra, stretch needles are specifically engineered to glide through elastic materials without skipping stitches.
Next, tweak your machine settings. Lower the presser foot pressure—high pressure can stretch seams and distort your project. Each machine is different, so check your manual for guidance, but a setting of one or lower is often ideal for knits.
Feed system matters, too. If you have a walking foot, use it! This attachment moves in sync with your feed dogs, helping both layers of fabric glide evenly and preventing the dreaded “lettuce edge” effect.
YouTube tutorials on machines like the Singer Heavy Duty show that a ballpoint needle, a zigzag stitch, and tension settings between three and four work wonders for spandex and other stretchy fabrics. Set your stitch length to 2.5 or 3, and your zigzag width to about two for a seam that stretches with your fabric—no more popped threads!
5.2 Seaming Techniques for Knits
When it comes to joining knits, the zigzag stitch is your new best friend. Its built-in stretch lets seams flex without breaking. For light- to medium-weight knits, try a stitch length of 1.5 and width of 5 for maximum elasticity. Trim seam allowances close to the stitching for a clean finish.
If your machine offers a stretch or overlock stitch (sometimes marked with a blue “S”), use it! Pair it with an overlocking foot to neatly finish raw edges while maintaining seam stretch. Set the width to about four, and guide the fabric gently—let the machine do the work.
Double needle hemming creates professional-looking hems with built-in stretch. Thread two spools, reduce stitch length, and adjust tension as needed to avoid puckering. The result: parallel straight stitches on the outside, with a zigzag on the reverse.
For delicate knits, French seams encase raw edges for a polished interior. Bound edges using jersey bias tape are another pro move, especially for curved seams.
Stabilizing Stretch Fabrics
Sometimes, knits need a little extra support. Place tissue paper under the fabric while sewing to control stretch and distortion—just tear it away after stitching. For hems, fusible interfacing adds structure and prevents stretching.
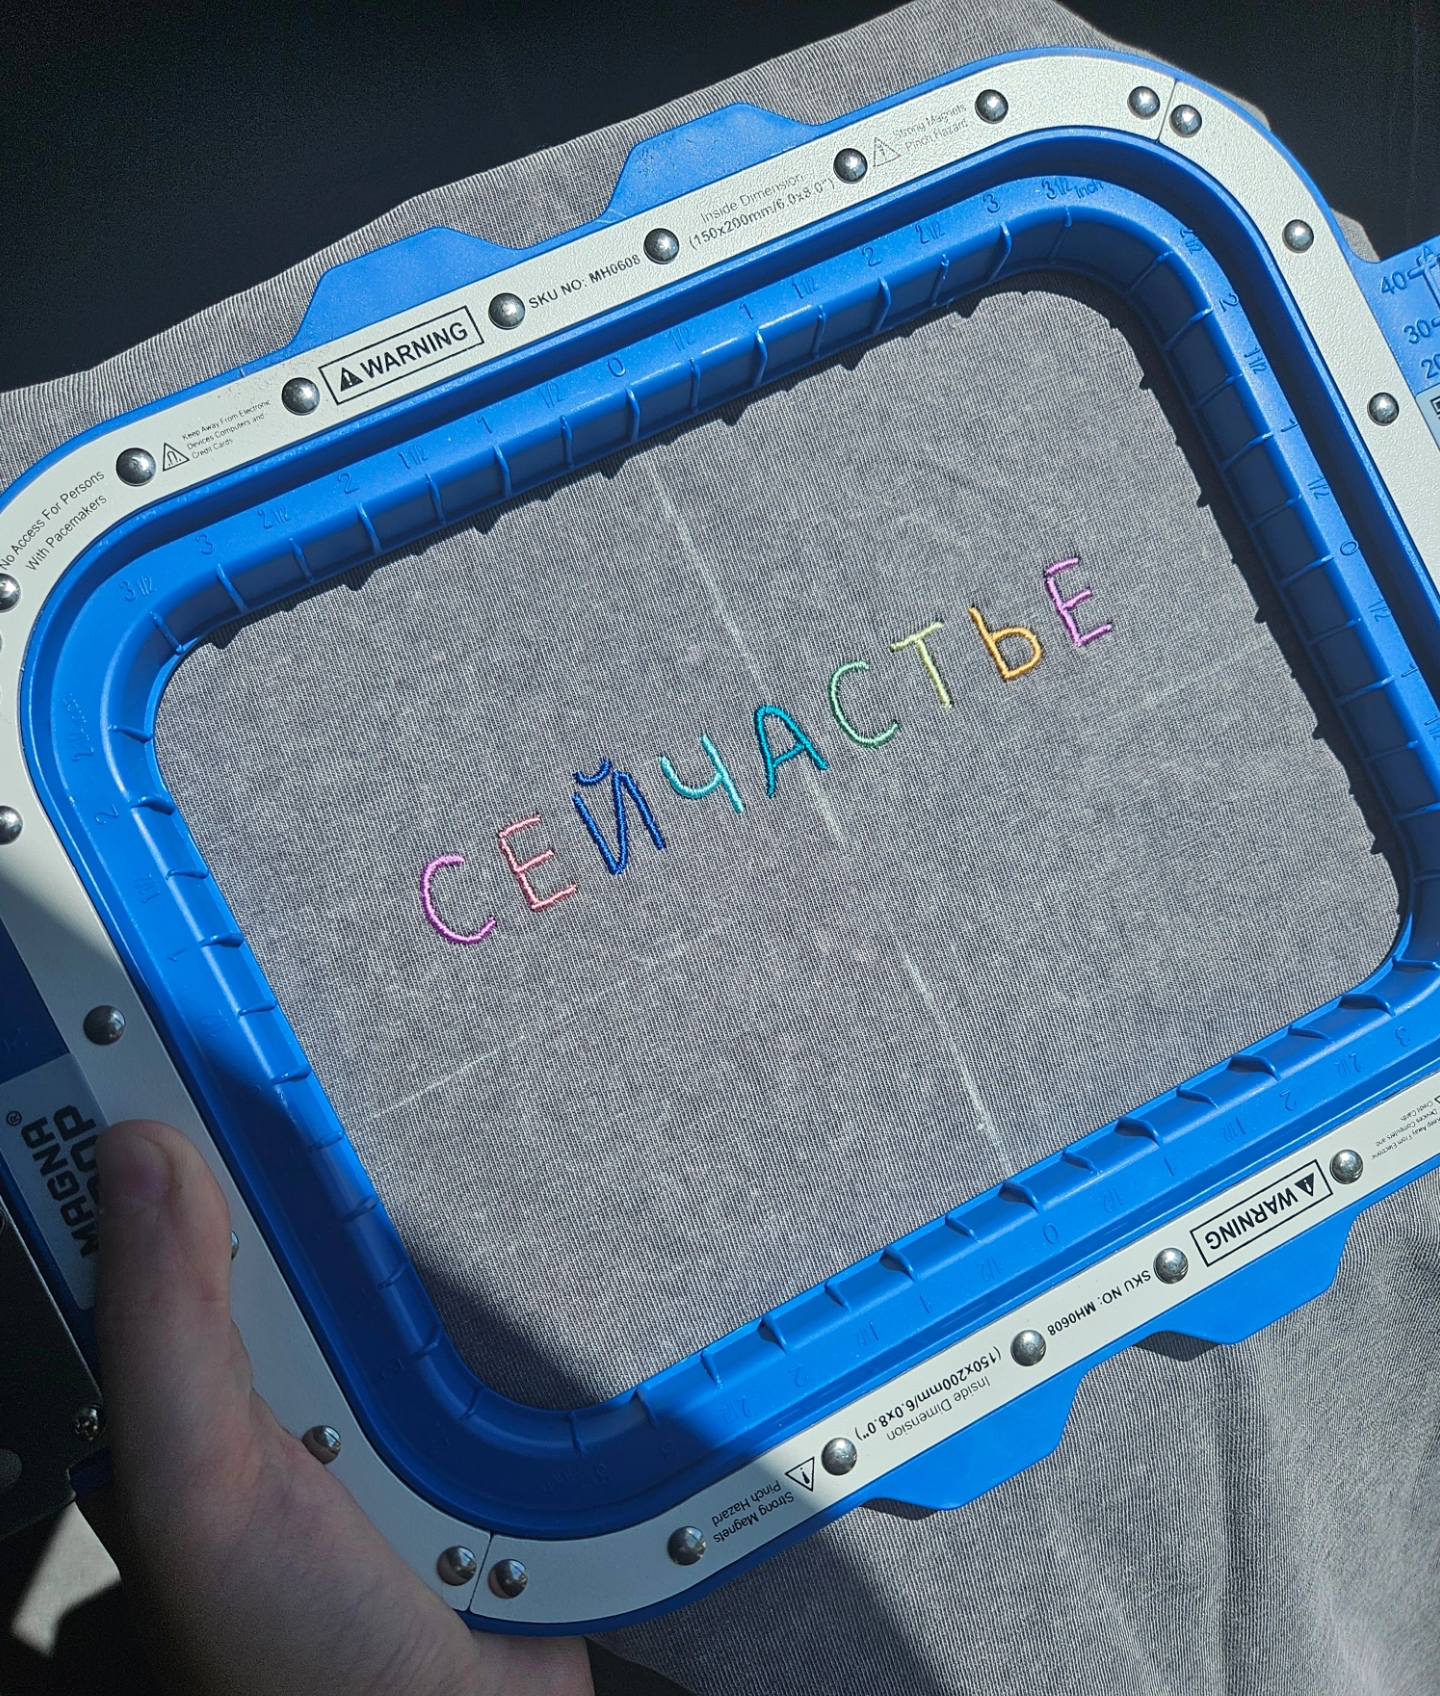
If you’re embroidering garments, stabilizing the fabric is essential. Using an embroidery hoop—such as those from Sewtalent—can help keep stretchy material taut and flat, ensuring crisp, even stitches.
Troubleshooting and Testing
Always test your settings on fabric scraps before diving into your project. Adjust thread tension to eliminate puckering, and don’t forget to backstitch at the start and end of seams for durability.
Care Considerations
Choose seam finishes based on how you’ll care for the garment. Zigzag and faux-overlock stitches hold up well to machine washing, while pinking shears or turn-fold-stitch methods are best for hand-washed items.
Final Word
Sewing knits without a serger is not just possible—it’s empowering. With the right needle, a few machine tweaks, and some practice, you’ll be turning out comfy tees, leggings, and more, all from your trusty home machine.
6. Beginner-Friendly Fabric Recommendations
Choosing the right fabric is like choosing your first dance partner—pick the right one, and you’ll glide across the floor. Pick the wrong one, and you might trip before the music even starts. For beginners, the best fabrics are stable, predictable, and forgiving, making the learning curve much smoother.
Top Picks for New Sewists
- Quilter’s Cotton: The gold standard for beginners. It’s tightly woven, doesn’t stretch or slip, and comes in a dizzying array of prints and colors. Perfect for quilting, crafts, and garments that don’t require much drape. Just remember: it frays, so finish those raw edges, and always pre-wash to avoid shrinkage.
- Flannel: Softer than quilter’s cotton and just as easy to handle, flannel is ideal for pajamas, baby quilts, and cozy projects. Like other wovens, it frays and can shrink, so pre-treat before you sew.
- Interlock Knit: Ready to dip your toes into stretch fabrics? Interlock knit is your gateway. It’s thicker and more stable than jersey, doesn’t curl at the edges, and is easy to cut and sew without wavy seams. Use it for T-shirts, knit dresses, and baby items. It doesn’t fray, but pre-washing is still a must.
- Poplin: Think of this as a sturdier cousin to quilter’s cotton. It’s thicker, drapes better, and is great for skirts, slacks, and jackets. Usually found in solid colors, it’s a breeze to work with.
- Shirting: Lightweight and crisp, shirting fabric is perfect for button-down shirts. Some blends are less prone to wrinkling, but all are stable and easy to sew.
- Cotton Voile: Lightweight with a slight gauzy texture, voile is ideal for blouses and summer dresses. It’s easier to handle than slippery sheers like chiffon, but may be slightly sheer, so plan accordingly.
Comparing Quilting Cotton vs. Apparel Cotton
Quilting cotton is stiffer and less drapey, making it better for structured projects or crafts. Apparel cottons—like broadcloth or chambray—offer more drape and softness, ideal for garments. When in doubt, check the fabric’s feel and drape in person, or read online descriptions carefully.
| Fabric Type | Stability | Ease of Pressing | Stretch | Durability | Best Uses |
|---|---|---|---|---|---|
| Quilter’s Cotton | High | Excellent | None | Good | Quilts, crafts, simple tops |
| Flannel | Good | Good | Minimal | Good | Pajamas, baby items |
| Interlock Knit | Good | Good | Moderate | Good | Tees, dresses, baby clothes |
| Poplin | Very High | Excellent | None | Excellent | Skirts, slacks, jackets |
| Shirting | High | Excellent | None | Very Good | Button-down shirts |
| Cotton Voile | Medium | Good | None | Good | Blouses, dresses, drapery |
Pro Tips for Beginners
- Pre-wash Everything: Most beginner-friendly fabrics shrink when washed. Pre-treat before cutting to avoid surprises after your first wash.
- Avoid Slippery or Super-Stretchy Fabrics: Save chiffon, satin, and high-spandex knits for later. They’re gorgeous, but can be frustrating for new sewists.
- Embrace Mistakes: Choose fabrics that are easy to seam rip—flannel and cotton are forgiving when you need to redo a seam.
- Test and Practice: Practice on scraps to get a feel for your fabric and machine settings.
Final Thought
Start with stable wovens or interlock knits, and you’ll build confidence—and skill—fast. Once you’ve mastered the basics, the world of fabric is yours to explore. Pairing these fabrics with best beginner embroidery machine ensures happy stitching!
7. Machine Embroidery Fabric Strategies
Machine embroidery is a dance between fabric, stabilizer, and hooping technique—a choreography that, when performed with skill, yields crisp, professional results. Let’s unravel the secrets behind fabric stabilization and smart hooping for embroidery on garments, with a focus on matching the right stabilizer to your fabric and leveraging the best tools for precise results.
7.1 Stabilizer Selection for Different Fabrics
The foundation of flawless machine embroidery is stabilization. Without the right stabilizer, even the most beautiful design can fall victim to puckering, distortion, or lost detail. Think of stabilizers as the unsung heroes—quietly supporting your fabric, absorbing the stress of thousands of needle penetrations, and ensuring every stitch lands exactly where it should.
Tear-Away Stabilizers: The Go-To for Stable Wovens
Tear-away stabilizers are the workhorses for stable woven fabrics—cotton, linen, denim, silk, felt, and wool. These stabilizers are engineered to provide temporary support, keeping your fabric flat and steady during stitching. Once the embroidery is complete, they can be gently torn away, leaving your project clean and soft. Tear-away is ideal for lightweight projects or when you want a quick finish without residual bulk.
Cut-Away Stabilizers: Essential for Stretch and Knit Fabrics
When working with stretch fabrics—think t-shirts, sweatshirts, jersey, and fleece—cut-away stabilizers are non-negotiable. Their permanent support prevents the fabric from stretching back and distorting your design after embroidery. Cut-away stabilizers come in various weights, from lightweight mesh (great for t-shirts where show-through is a concern) to mid-heavyweight adhesive types for high-stitch-density designs.
Water-Soluble Stabilizers: For Delicates and Decorative Work
Delicate fabrics like organza, tulle, chiffon, and lace require water-soluble stabilizers. These dissolve completely in water, leaving no trace behind—perfect for freestanding lace or intricate details where any leftover stabilizer would mar the look. Adhesive water-soluble varieties provide extra stability during stitching, while transparent films support three-dimensional embroidery.
Specialty Toppings: Taming Texture
Textured fabrics—terry cloth, fleece, plush, chunky knits, corduroy—often swallow up embroidery stitches. Topping materials placed above the fabric prevent threads from sinking, ensuring your design stands out with crisp definition.
Mesh Stabilizers: The Secret for Lightweight Knits
For projects like t-shirt embroidery, poly and nylon mesh stabilizers are a smart choice. Their reduced visibility prevents show-through, maintaining the garment’s appearance while providing the necessary support.
Professional Tips for Selection and Use
- Always match stabilizer type and weight to your fabric and design. High-density, fill-heavy embroidery calls for medium to heavyweight stabilizers, regardless of fabric.
- Inspect stabilizer quality. Professional embroiderers recommend sourcing from specialty suppliers rather than general retailers—look for uniform material density to avoid irregular stitch quality.
- Explore advanced options. Fusible stabilizers bond with heat, water-activated adhesives offer temporary hold, and iron-on varieties are excellent for appliqué or tricky placements.
Hooping for Precision
For garment embroidery, precise hooping is crucial—especially on stretch fabrics. Tools like Sewtalent hoops, Hoopmaster hooping station, or comparable brands are designed to work seamlessly with stabilizers, holding fabric taut and flat for even, distortion-free stitching. Whether you’re embroidering a single logo or a dense, intricate motif, investing in a quality hoop and matching stabilizer is the surest way to professional results.
8. Fabric Care and Maintenance Guide
Preserving the beauty and longevity of your stitched creations starts long before the first stitch—and continues well after the last. Proper fabric care is the invisible thread that ties your project together, ensuring it looks and feels its best for years to come.
Pre-Washing: The First Line of Defense
Pre-washing fabric is more than a good habit—it’s essential. This step removes manufacturing chemicals and sizing, and, most importantly, pre-shrinks your fabric to prevent post-project surprises. Cotton knits, for example, can shrink up to 2–3 inches per yard. Always wash fabrics with similar colors in cool water, using a gentle cycle and mild, dye-free detergent. Skip the bleach and fabric softener—they can weaken fibers and cause discoloration.
Washing Techniques by Fabric Type
- Cotton: Wash in any temperature; tumble dry high or line dry.
- Linen: Wash in any temperature; dry on low heat or line dry to avoid excess shrinkage.
- Polyester: Warm wash, low heat dry.
- Rayon (Viscose): Cold wash, delicate cycle or hand wash; never tumble dry—press out water and lay flat.
- Delicates (voile, lawn): Cold wash, delicate cycle or hand wash; brief low-heat dry, then line dry.
- Wool and Silk: Preferably dry clean; if washing at home, use cold water, delicate cycle, and lay flat to dry.
For especially delicate fabrics, hand washing with a fabric-appropriate detergent is the gentlest option—immerse, lightly agitate, rinse, and lay flat.
Ironing and Pressing: The Art of Finishing
Pressing is for shaping and setting seams during construction; ironing is for removing wrinkles after. Always select the right temperature for your fiber:
- Cotton and Linen: High heat with steam; iron while slightly damp for best results. Use a pressing cloth to avoid shine.
- Polyester and Rayon: Low to medium heat; iron inside out, and steam gently.
- Wool: Medium to low heat with steam, always with a pressing cloth.
Professional tools—seam rolls, clappers, pressing cloths—help achieve crisp edges and perfect seams. Press seams open as you sew for a polished finish, and always remove pins before pressing.
Storage and Long-Term Maintenance
After ironing, fold or hang your fabric immediately to preserve its smoothness. For finished garments, wash inside out on cold and tumble dry low to prevent fading and damage. Consistent care routines from pre-wash to storage ensure your projects maintain their structure, color, and beauty over time.
9. Conclusion: Mastering Fabric for Professional Results
Fabric mastery isn’t about memorizing every weave or fiber—it’s about understanding how each choice shapes your final creation. Match your fabric to your project’s needs, test for stretch and recovery, and never underestimate the power of proper care. Whether you’re stitching a delicate blouse, creating embroidery machine quilt designs, or a bold embroidered sweatshirt, confidence grows with every experiment and every lesson learned. Embrace the journey, trust your hands, and let your creativity lead the way—professional results are within reach, one thoughtful choice at a time.
10. FAQ: Stitching Fabric Essentials Answered
10.1 Q: Can I use quilting cotton for apparel?
A: Absolutely—you can use quilting cotton for clothing, especially for simple tops, skirts, or dresses that don’t require a lot of drape. Quilting cotton is tightly woven, stable, and easy to sew, making it a favorite for beginners. However, keep in mind that it’s generally stiffer and less flowy than apparel cottons like broadcloth or chambray. If you prefer garments with more movement or a softer feel, look for cottons specifically labeled for apparel. Sometimes, quilting cotton softens a bit after washing, but it will still retain a crisp structure. For fitted or drapey garments, you may want to explore other woven fabrics.
10.2 Q: How can I prevent knit fabric from curling at the edges?
A: Knit fabrics—especially lightweight jerseys—are notorious for curling at the edges after cutting. To tame the curl, try these tips:
- Start with a stable knit: Interlock knits are less likely to curl than jerseys or rib knits, making them easier for beginners.
- Use spray starch or a gentle press: Lightly starching or pressing the edges before cutting can help keep them flat.
- Lay fabric flat and support it: When cutting, let excess fabric rest on a table or chair to reduce gravity’s pull, as suggested in YouTube tutorials.
- Pin or weight your pattern pieces: Secure your fabric before cutting to keep everything in place.
- Sew with tissue paper: Placing tissue under the seam while sewing can stabilize the fabric and is easily removed afterward.
Remember, some curl is normal—don’t stress about perfection! With practice, you’ll find methods that work best for your projects.
10.3 Q: What’s the difference between 14-count and 28-count evenweave for embroidery?
A: The numbers refer to the fabric’s "count"—how many threads or squares per inch. 14-count means 14 squares per inch, while 28-count has 28 threads per inch. Here’s the twist: on 14-count Aida, you usually stitch over one square, so your stitches are larger. On 28-count evenweave or linen, you typically stitch "over two" threads, which actually results in the same stitch size as 14-count Aida. The main differences:
- Aida (14-count): Stiff, easy-to-see grid, perfect for beginners, larger stitches.
- Evenweave/Linen (28-count): Softer, finer, more flexible fabric; stitches are smaller if you work "over one," same size as 14-count if you stitch "over two."
- Look and feel: Linen has a natural, textured appearance; evenweave is smoother and more uniform.
- Technique: Evenweave and linen require a bit more counting precision, but allow for more detailed or delicate designs.
Choose based on the look you want and your comfort with counting threads—Aida is beginner-friendly, while evenweave and linen offer more versatility for experienced stitchers.
10.4 Q: Are there beginner-friendly fabrics I should start with?
A: Yes! Stable wovens like quilting cotton, flannel, poplin, and shirting are excellent for new sewists—they’re easy to cut, don’t slip, and hold their shape. For stretch fabrics, interlock knit is a gentle introduction because it doesn’t curl and is easy to sew. Always pre-wash your fabric to avoid surprises after your first wash, and avoid slippery or ultra-stretchy fabrics until you’re more confident. Practice on scraps and don’t be afraid to make mistakes—experience is the best teacher.
10.5 Q: How do I choose the right fabric for my project?
A: Consider three main factors: weight, fiber content, and stretch. Match the fabric’s weight to your project (lightweight for blouses, heavy for jackets), choose fibers that suit your needs (cotton and linen for breathability, polyester for durability), and check the amount of stretch if your pattern calls for it. Touch and test fabrics in person when possible, and read online descriptions carefully. Don’t hesitate to experiment—finding your favorites is part of the creative journey!
10.6 Q: How do I calculate how much fabric I need for embroidery or sewing?
A: For embroidery, check your pattern’s stitch count on resources like embroidery designs com and fabric count. Divide the stitch count by the fabric count (e.g., 70 stitches wide on 14-count Aida = 5 inches wide). Add at least 3 inches of extra fabric on all sides for finishing. For sewing garments, pattern instructions usually list required yardage. When in doubt, buy a little extra—better safe than sorry, especially if you need to match prints or allow for shrinkage.
10.7 Q: What’s the best way to care for my fabrics before and after sewing?
A: Pre-wash all fabrics to remove sizing and prevent shrinkage—especially cottons and linens. Wash with like colors, use a gentle cycle, and avoid harsh detergents or bleach. After sewing, follow care instructions based on fiber content: cotton and linen can handle higher heat, while rayon, polyester, and delicates need cooler water and lower dryer settings. Iron with the appropriate heat for your fabric, and store finished projects folded or hung to maintain their shape.
Have more questions? Drop them in the comments below—your curiosity fuels the next round of stitching adventures!